
Planning A Garden? Here’s What You Need To Be Doing Now!
No matter what part of the country you live in, now’s the time to start planning what you’ll plant in your garden this spring.

Many parts of the country have seen frigid temps and winter storms the past few weeks. In fact, we’re in the middle of some abnormally cold weather here in central Florida.
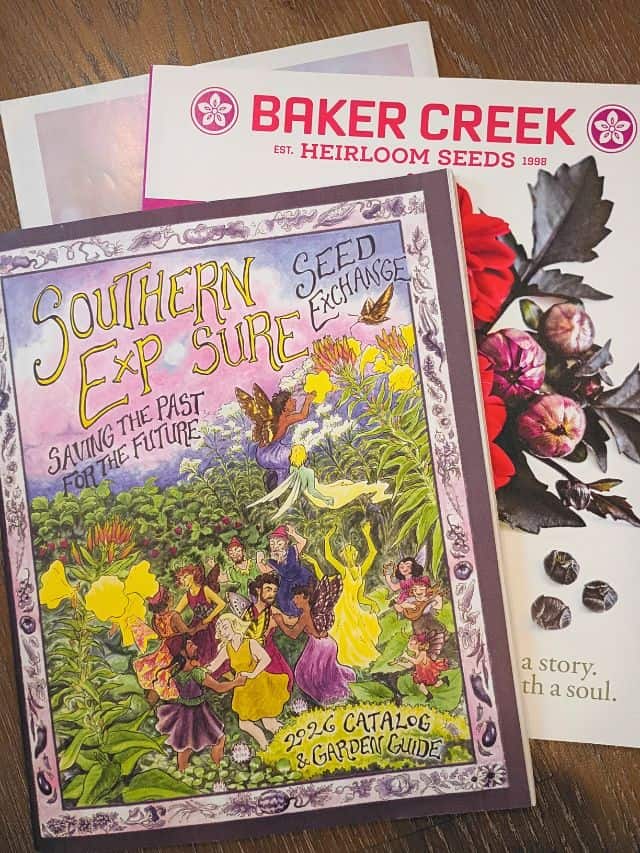
It doesn’t seem like it’s time to plan your spring garden when you step outside. But there’s a reason why the seed companies start sending their catalogs out in January. If you are new to gardening and your goal is to have a bountiful harvest at the end of your growing season, there are some things you need to be doing right now.
1. Start by making a list of the vegetables and flowers you want to grow.
Think about what you like to eat and make a “wish list” of the veggies you’d like to harvest from your own backyard. For us, those are things like tomatoes, peppers, lettuces, snap peas, cucumbers, green beans, onions and sweet potatoes.
We also like to grow some flowers that will attract pollinators and/or act as a trap plant for pests. These include marigolds, nasturtiums, sunflowers, and some Florida-friendly varieties like spotted beebalm, starry rosinweed, and butterflyweed. What types of flowers will you add to your list?
2. Do some research about what grows best in your area.
To do this, you’ll need to determine which grow zone you’re in. You can enter your zip code into a website like this to find out quickly. Knowing your grow zone will help you decide what types of plants will do well for you. For instance, we’re in Zone 9b, which is a mostly subtropical climate. We need to focus on crops that would also grow well in areas like the Bahamas, not Northern Europe.
Next, you’ll want to look up which varieties of the plants on your wish list will grow best where you live. Consider things like your climate and the length of days during the growing season (so you know how much sun your plants will get). If you live in an area with a short growing season, you’ll want varieties that take less time to mature. If you have pest issues, look for a variety that is resistant to them. There are a number of resources on the internet that can help you pinpoint the conditions you need to address. We’ve found several local gardeners who have YouTube channels that have been a huge help.
3. If this isn’t your first time planning your garden, take some time to review last season.
We try to keep a journal where we record what we grew each season, how it progressed, and what the results were. There are countless ways to keep these kinds of records. If you’ve been gardening for any length of time you probably have your own system.
- If you’re just starting out, here’s what we do: I’ve found that we can’t keep up with anything too complicated. So I just buy a small lined notebook for each year and use it like a garden diary. We write in dates and notes about planting, first sprouts, transplanting, fertilizing, any pest or fungal issues, weather issues, and how we did with our harvests. It’s become an invaluable resource to us.
When we start to plan this season’s garden, we take time to look back and review. We ask ourselves questions like which varieties grew best? Which vegetables did we like the taste of? Did some varieties seem more resistant to pests? Which ones will we never grow again? (I’m looking at you, French breakfast radishes and Jericho lettuce!) Make sure you write these things down. You won’t remember by next year if you don’t!
4. Now that you know what you will grow, you need to decide how much.
One of the biggest things we had to learn when we started was how much of each type of vegetable we needed to grow. Looking back, we laugh about how we planted one or two okras or a half dozen bean plants our first season. Even if the plants were healthy and putting out their max yield, we couldn’t harvest enough at one time to have a meal. You’ll probably need to plant more than you think if you want enough for fresh eating, and maybe a little extra for freezing or preserving.
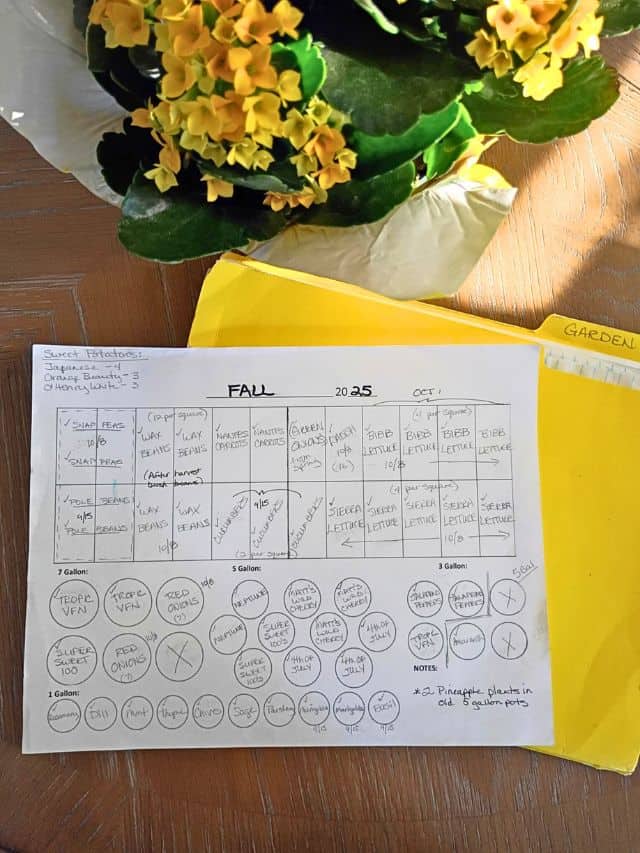
We loosely follow the Square Foot Gardening method in our raised bed and grow bags. This website offers a handy guide to how many plants you should grow in each square foot or grow bag. Whatever space you have to grow in, fill it! If you end up with too much (which is rarely the case for us), there are always ways to use it or give it away.
5. Next, decide what will grow where.
Most gardeners utilize a combination of raised beds, grow bags or pots, and in-ground spaces. You might want to sketch out a diagram of all your growing spaces before you start to plan. It was helpful for me to create one that I can print out each season and fill in the blanks.
You’ll need to figure out what parts of your garden get the most light. We did this by taking a photo of the back yard from a second story window at various times of the day. You can also just sketch out where the sun/shade is from hour to hour. Adjust your planting layout for the plants that need several hours of sunlight as opposed to plants that do better in some shade.
If you’re planting in the ground, you should also note any wet or dry areas. For instance, the back of our yard slopes pretty steeply and nothing grows on that consistently dry hill. Or you could have low-lying areas that stay wetter.
You should also consider plants that grow well together. Or don’t. For instance, onions protect peppers from pests, and basil helps tomato plants stay healthy. But you shouldn’t plant brassicas like cabbage or broccoli next to tomatoes because they attract pests and compete for nutrients. And onions and garlic can stunt the growth of peas or beans. You can easily find these things out on the internet, just ask ChatGPT about what you’re planting!
6. Make sure you have all the seeds and other supplies you need to start planting.
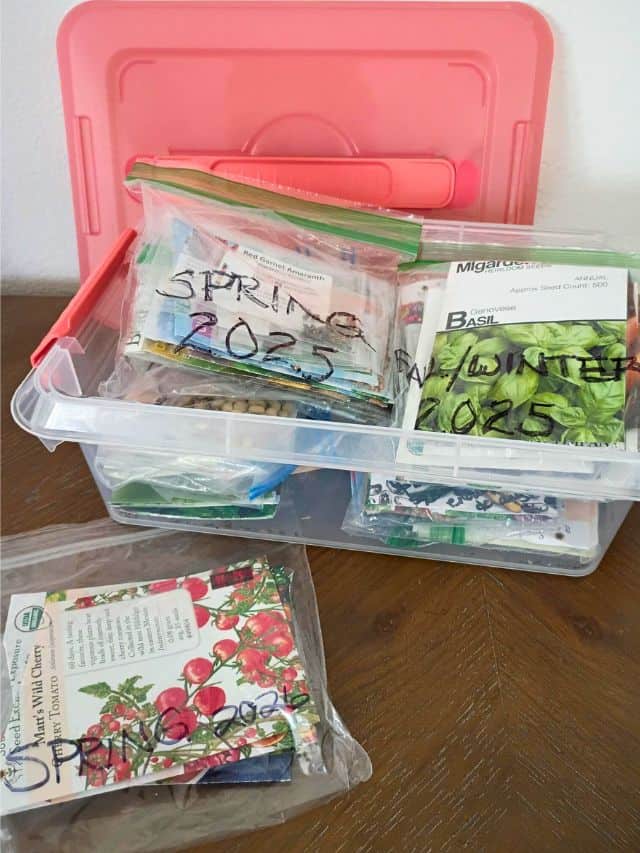
Once you’ve been growing a garden for a while, you’re going to need a system for storing your seeds (commercial or those you’ve saved yourself) and keeping track of what you have from season to season. This is another area where there are any number of methods people use, so you’ll need to discover what works best for you. I put all the seed packs for one season (including the empty ones so I’ll remember the specific varieties) in a ziplock bag and label it with a Sharpie. Then I keep those bags in a plastic container with a snap-on lid, with a couple of silica gel packets thrown in for good measure.
- People have different opinions about how long you can save seeds. I’ve found that seeds from most varieties we’ve grown will last at least two-three years when kept in a cool, dry place. Sometimes even longer. I try to rotate the seed packs for varieties we grow over and over again so I’m using up the oldest stock first. I plant a couple more of the older seeds in each hole to make sure some will germinate. They usually they come up just fine.
Now that you know what you’re planting, and how much, go through your seed stock and see if you have enough of the seeds you need for each item. By now we’ve settled on some favorites that do well for us, and we keep planting those season after season. But I also like to try a couple of new things, as well.
We buy our seeds from a few different sources. We’ve found a couple of local seed companies that we use for the majority of what we plant. I try to order everything I need from them all at once to save shipping costs. But we also supplement with some seeds we can’t get through them, like our favorite Supersweet 100 cherry tomatoes, or red grano onions. You can order seeds online from any number of seed companies, or select them from the racks full of seeds in a big box store like Lowes or Home Depot. We’ve even had some success with seeds we bought at a dollar store. You decide where – just make sure you buy/order them far enough in advance so you have them when it’s time to plant!
If you’re starting seeds indoors to transplant later, make sure you also have seed trays or cups, seed-starting mix, and plant labels. You may also want to invest in a light source to help the seedlings get off to a good start. Even a simple lamp like this with a grow light bulb will work when you’re starting out.
7. Figure out your planting dates, and get ready to plant!
This same website you can use to find your grow zone will also tell you the frost dates where you live. Determine your last frost date, then count backwards to see when you should be starting your seeds for transplants. Our last frost date is between February 1st and 15th. We started seeds for our tomatoes and peppers six to eight weeks before that on December 20th. The back of the seed packet will usually tell you when you need to plant the seeds and when to transplant the seedlings into your garden
For those plants you’re sowing directly into the garden, make sure you have your beds/bags/pots cleared and tilled. You will probably want to mix in some compost and/or fertilizer that is appropriate for what you’re planting. Make sure you have plenty of those, too.
Of course, you can always buy plants from a nursery or garden center. We quickly discovered that was pretty expensive, especially if we’re growing a garden to save money on food costs. But they can help you salvage your season if you missed your window for starting transplants or something else held you back.

Now that you’re prepared, you can spend some time dreaming about how beautiful – and bountiful – your spring garden will be!
It takes a little time and effort to plan your garden each season, but we think it’s fun. It’s a never-ending process of learning, trying new things, and seeing what works and what doesn’t. We’ve tried some plants that we didn’t know anything about and loved them. We’ve also had failures and frustrations. But every new season is a fresh start. And seeing those first tiny sprouts pushing up through the soil never gets old!
Are you a first time gardener or a seasoned pro? Do you have any questions, or tips you’d like to share? Tell us in the comments below!
* As an Amazon Associate, I earn a small commission from qualifying purchases.